


While writing code is essential, a developer or system administrator must also know how to monitor and trigger these jobs manually through the Odoo User Interface (UI).
Here is a step-by-step guide to finding the "brain" of Odoo's automation.
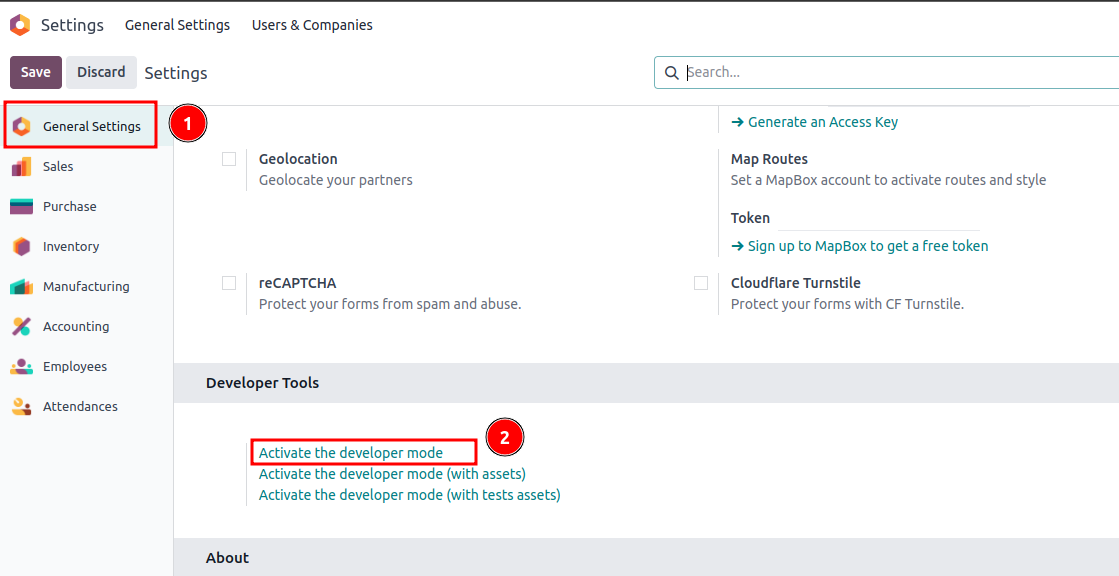
Step 1: Activate Developer Mode
The "Scheduled Actions" menu is a technical setting. It is hidden by default to prevent accidental changes by end-users.
- Navigate to the Settings app.
- Scroll down to the bottom of the page.
- Click on Activate the developer mode.
- Tip: You will know it's active when you see the "bug" icon in the top right corner of your header.
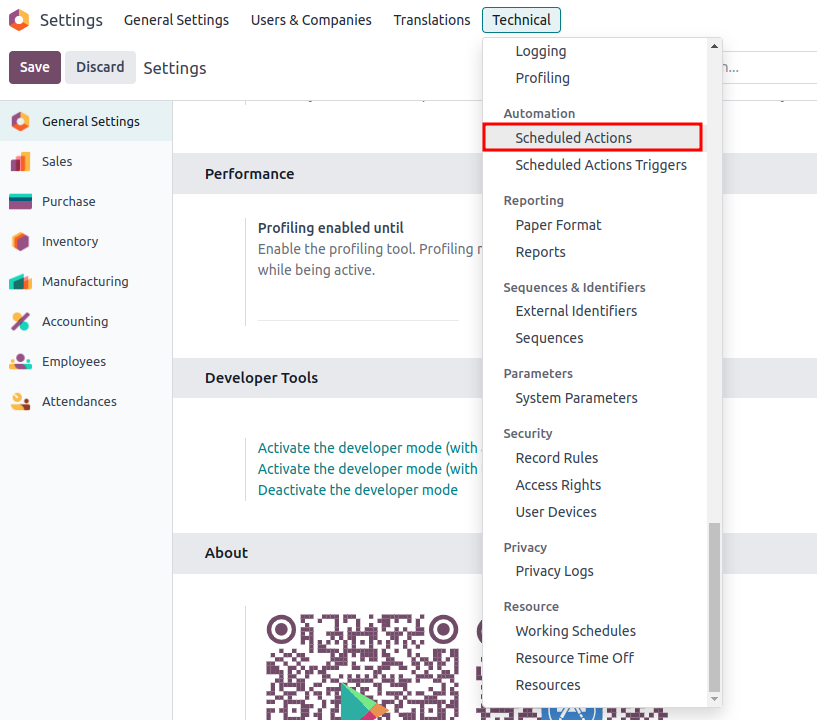
Step 2: Navigate to Scheduled Actions
Once Developer Mode is active, a new top-level menu called Technical will appear.
- Go to Settings (if you aren't already there).
- In the top menu bar, click on Technical.
- Under the Automation section, select Scheduled Actions.
Step 3: Understanding the Scheduled Actions List
Once you enter the list view, you will see all the cron jobs installed in your system. You can use the search bar to find your specific module's cron job.
Key Columns to Monitor:
- Next Execution Date: This tells you exactly when the job will run next.
- Model: The object the cron job is interacting with (e.g., sale.order).
- Active: A toggle to enable or disable the job without deleting it.

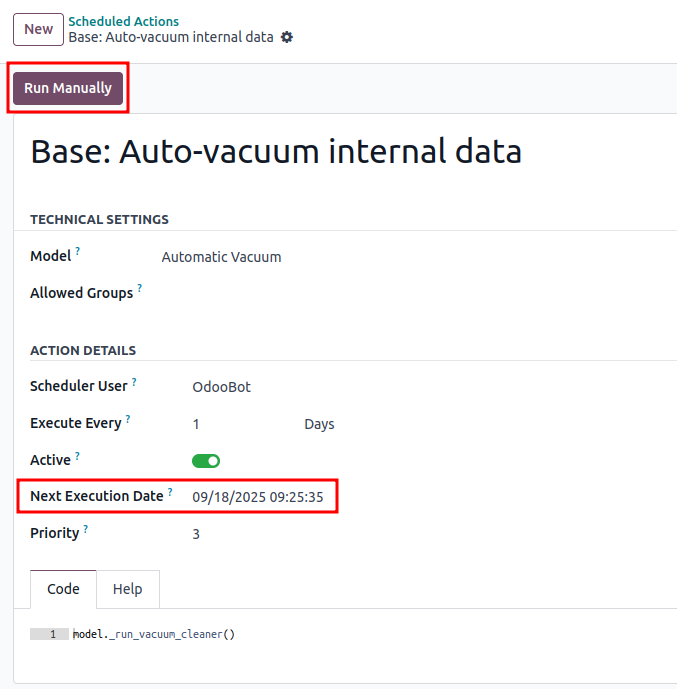
Step 4: Configuring and Testing the Job
Click on any record to see its details. This is where you can manually override the schedule or debug the logic.
Key Actions inside the Form:
- Run Manually: This is the most important button for developers. Clicking this will trigger the code immediately, allowing you to test if your Python function works without waiting for the scheduled time.
- Execute Code: You can see the actual Python snippet being called. In Odoo 18, this usually looks like model._your_cron_method().
- Cron Self-Deactivation: If a job fails multiple times, Odoo might automatically set it to inactive. Check the Active checkbox if your job has stopped running.
Step 5: Checking Logs for Debugging
If your Cron Job isn't working as expected, Odoo 18 provides a way to see what happened during the last execution.
- Look for the "Execution Layout" or check the Server Logs.
- In Odoo 18, if a Cron Job crashes, it will often leave a traceback in the server terminal/logs.
- Note: If you are on Odoo.sh or a private server, you should check the odoo-server.log file to see the _logger outputs we defined in our Python code.
Conclusion: Why Cron Jobs are Essential for Your Odoo 18 Strategy
Mastering Scheduled Actions in Odoo 18 is more than just a technical skill; it is about building a proactive rather than reactive system. By automating repetitive tasks—such as inventory reordering, payment reminders, or data cleanup—you allow your business logic to work 24/7 without human intervention.
Key takeaways to remember:
- Performance is Key: Always use limit in your search queries to avoid dragging down server performance.
- Visibility Matters: Use the UI to monitor your nextcall dates and always check server logs for background errors.
- Security First: Ensure the user assigned to the Cron Job (usually the Root/Admin user) has the necessary access rights to the records it will modify.
With the cleaner interface of Odoo 18 and a robust Python backend, your automation possibilities are virtually limitless. Start small, log everything, and watch your Odoo instance become a self-sustaining powerhouse.