1. Overview
Objective: create a fully custom PDF report for sale.order in Odoo 17 and 18, using a dedicated QWeb template and a Python report class.
Result: a new “Custom Sales Order PDF” print action on the Sales Order form.
Module name used in this example: custom_sgeede.
2. Create a Server Action Method Inside sale.order
from odoo import models, fields
class SaleOrder(models.Model):
    _inherit = 'sale.order'
    def action_custom_report_pdf(self):
        return self.env.ref(
            "custom_sgeede.action_report_custom_sale_order"
            ).report_action(self)
This adds a callable method that triggers the custom PDF report.
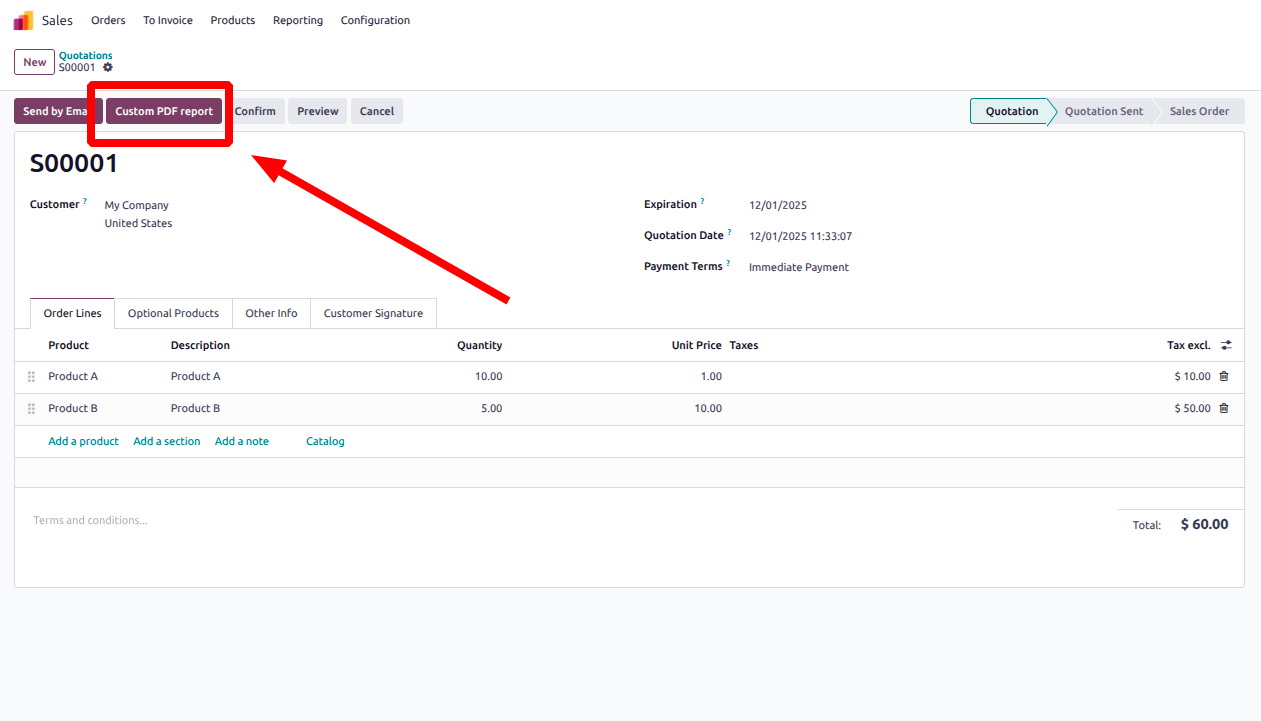
You can attach this method to a button in the SO form.
3. Add a Print Button
File: views/sale_order_views.xml
<?xml version='1.0' encoding='utf-8'?>
<odoo>
    <record id="sale_order_inherit" model="ir.ui.view">
        <field name="name">sale.order.inherit</field>
        <field name="model">sale.order</field>
        <field name="inherit_id" ref="sale.view_order_form"/>
        <field name="arch" type="xml">
            <xpath expr="//button[@id='action_confirm']" position="before">
                <button name="action_custom_report_pdf"
                         string="Custom PDF report"
                         class="btn-primary"
                         type="object"
                />
            </xpath>
        </field>
     </record>
</odoo>
This adds a button Custom PDF Report inside the header of the Sales Order.
4. Create the Report Action
File: report/sale_custom_report.xml
<?xml version="1.0" encoding="UTF-8"?>
<odoo>
    <record id="action_report_custom_sale_order" model="ir.actions.report">
        <field name="name">Custom Sales Order PDF</field>
        <field name="model">sale.order</field>
        <field name="report_type">qweb-pdf</field>
        <field name="report_name">custom_sgeede.custom_sale_order_report</field>
        <field name="report_file">custom_sgeede.custom_sale_order_report</field>
        <field name="print_report_name">
            (object.name or 'SO') + ' - Custom.pdf'
        </field>
        <field name="binding_model_id" ref="sale.model_sale_order"/>
        <field name="binding_type">report</field>
    </record>
</odoo>
5. Create the QWeb Template
File: report/sale_custom_report.xml
<?xml version="1.0" encoding="UTF-8"?>
<odoo>
<template id="custom_sale_order_report">
<t t-call="web.external_layout">
<div class="page">
<main>
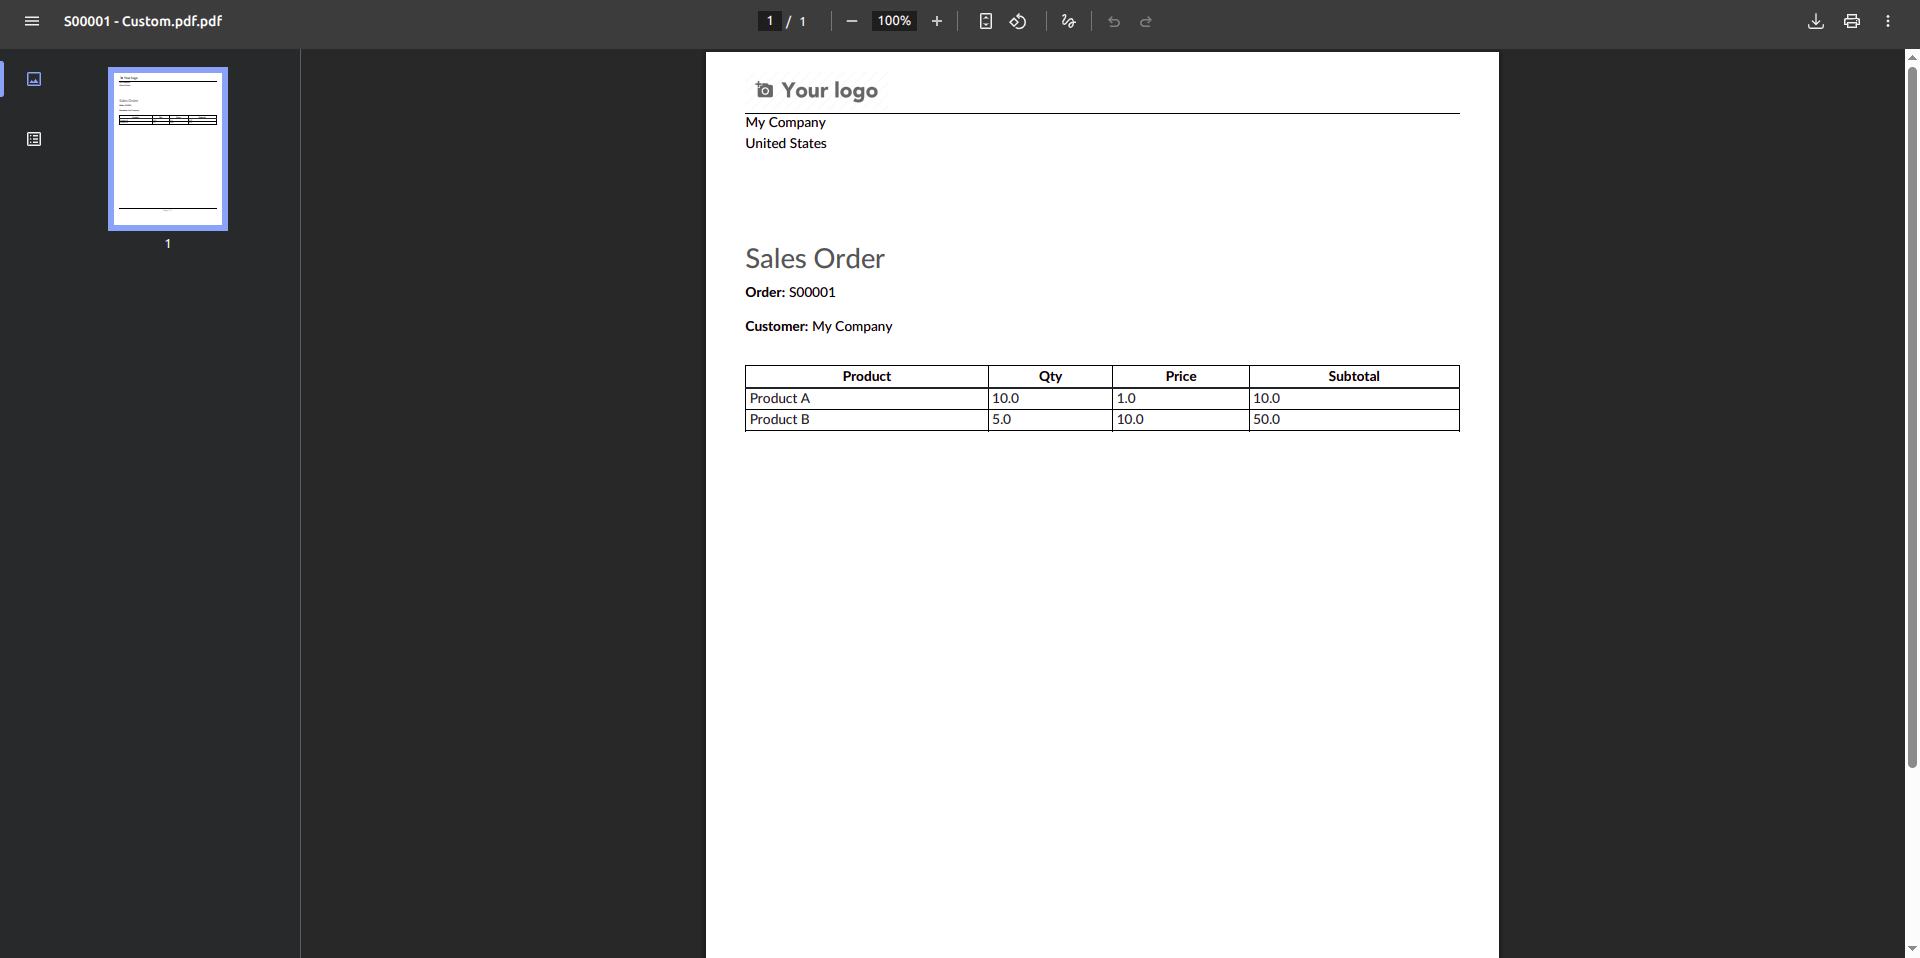
<h2>Sales Order</h2>
<p><strong>Order:</strong> <t t-esc="docs.name"/></p>
<p><strong>Customer:</strong> <t t-esc="docs.partner_id.name"/></p>
<table class="table table-sm mt32" style="width:100%; border-collapse: collapse;">
<thead>
<tr>
<th style="border:1px solid #000; padding:4px;">Product</th>
<th style="border:1px solid #000; padding:4px;">Qty</th>
<th style="border:1px solid #000; padding:4px;">Price</th>
<th style="border:1px solid #000; padding:4px;">Subtotal</th>
</tr>
</thead>
<tbody>
<t t-foreach="docs.order_line" t-as="l">
<tr>
<td style="border:1px solid #000; padding:4px;">
<t t-esc="l.product_id.display_name"/>
</td>
<td style="border:1px solid #000; padding:4px;">
<t t-esc="l.product_uom_qty"/>
</td>
<td style="border:1px solid #000; padding:4px;">
<t t-esc="l.price_unit"/>
</td>
<td style="border:1px solid #000; padding:4px;">
<t t-esc="l.price_subtotal"/>
</td>
</tr>
</t>
</tbody>
</table>
</main>
</div>
</t>
</template>
</odoo>
6. Upgrade Module & Test
Now you can simply upgrade your custom module as usual and click the custom button in the sale order form.
Result: