


Introduction
Developing and customizing an Odoo database is an exciting process, but making changes directly on your live production database is a recipe for disaster. A simple bug in a custom module or a misconfigured setting can take your entire business offline. That’s why Odoo.sh provides a powerful and secure solution: Staging Branches. This feature allows you to create a safe sandbox where you can test code, modules, and configurations using a copy of your real production data—without any risk to your live operations. In this guide, we’ll walk through what staging environments are, why you need them, and exactly how to set one up in Odoo.sh.
What is Staging Environment?
In the Odoo.sh ecosystem, every branch of your Git repository can be assigned a "stage." There are three distinct stages :
- Production: This is your live site. Only one branch can be in this stage, and it runs the code that powers your actual business. Emails are sent, payments are processed, and scheduled actions run normally.
- Staging: This is a testing ground that creates a neutralized duplicate of your production database. It is designed to look and feel like production but is isolated to prevent accidents .
- Development: These branches create fresh databases with demo data to run unit tests and develop new features. They are short-lived and not connected to your production data.
When you set a branch to the "Staging" stage, Odoo.sh performs a clever trick: it copies your production database but automatically "neutralizes" it . This means you get a real-world data set to test with, but without the real-world consequences.
What is Neutralize?
To ensure you don't accidentally spam clients or trigger financial transactions, Odoo.sh automatically modifies the staging database to be safe . This includes:
- Email Catcher: All outgoing emails are intercepted. You can view them in the "Emails" tab of your staging branch, but they are never sent to the actual customers .
- Disabled Scheduled Actions: Scheduled actions are disabled by default, but can be manually executed for testing.
- Payment & Shipping Providers: These are automatically switched to "Test Mode" so you can process fake transactions .
- IAP Services: In-app purchasing services are disabled
Creating Staging Environment in Odoo.sh
- Having Staging Branch Ready
Staging branches are limited by your Odoo.sh plan, and you can configure how many staging slots are available. you can navigate to Settings > Staging Branches and set how many staging you need.

2. Assign the Staging
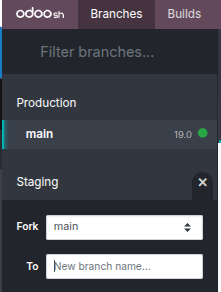
Navigate to Branches ,identify the branch you want to test. This is usually your main production branch (to test the current state) or a development branch containing new features. Click icon + to create a Staging, it will show the Fork that available and input the Branch name. If you want to copy the main or production branch select it and then Click Enter. Or Click and hold the branch card, then drag it up to the "Staging" section header and release it.
3. Wait for the Build
Odoo.sh will begin building your staging environment. This process takes a few minutes. It is:
- Cloning your code from that branch.
- Creating a duplicate of your production database.
- Applying the "neutralization" settings mentioned above.
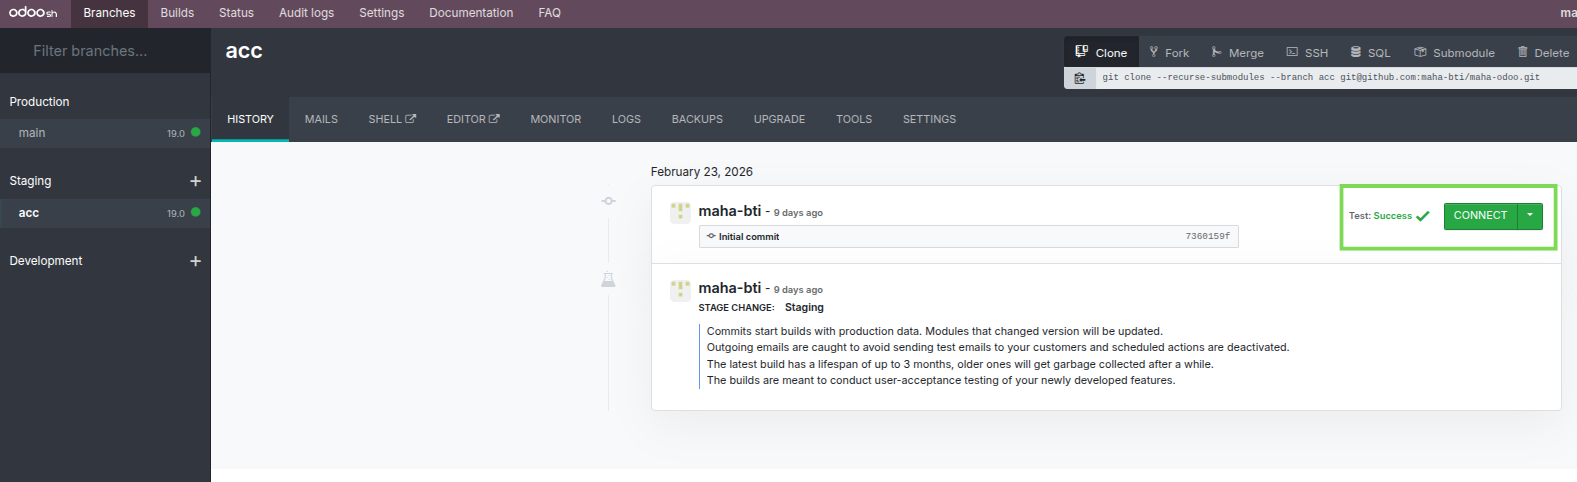
Once the build is complete, you will see a new database listed under the "Staging" section. You can click the "Connect" button to log in and start testing.
Choosing Your Staging Data
By default, a staging branch copies the production database. However, there are scenarios where you might need a different dataset .
- Standard Staging (Copy of Production) This is the default behavior when you drag a branch to the Staging stage. It is ideal for User Acceptance Testing (UAT) where you need to verify that a new feature works with your actual business data.
- Fresh Database (or Imported Data) What if you don't want to use production data? For example, you might want to test a module installation process from scratch, or you might want to copy data from a different staging branch rather than production .
To do this:
Create a Development Branch: Set a branch to "Development" first. This creates a fresh database with demo data.
Manually Import a Backup: In the staging branch's "Backups" tab, you have an "Import Database" option . You can upload a database dump from another branch or a local file. As noted by community experts, you can take a backup from one staging branch and import it into another
Conclusion
Staging environments in Odoo.sh are an indispensable tool for any developer or business owner who values stability. By providing a neutralized copy of your production data, they allow you to catch bugs, test configurations, and validate user experiences in a risk-free setting.
Start using staging branches today to ensure that every update you push to your production database is polished, tested, and ready for your team.