


Are you searching for a robust ERP solution that is easy to use, accessible from anywhere, and doesn't require you to be an IT expert managing complicated servers? Odoo Online is the answer. As the SaaS (Software as a Service) version of Odoo, it allows you to start using this powerful business application immediately, without any technical installation headaches.
In this comprehensive guide, we will walk you through, step-by-step, the entire process of setting up your very first Odoo Online database—from initial registration to having a functioning system ready for your business.
Let’s dive in!
Step 1: Access the Odoo Registration Page
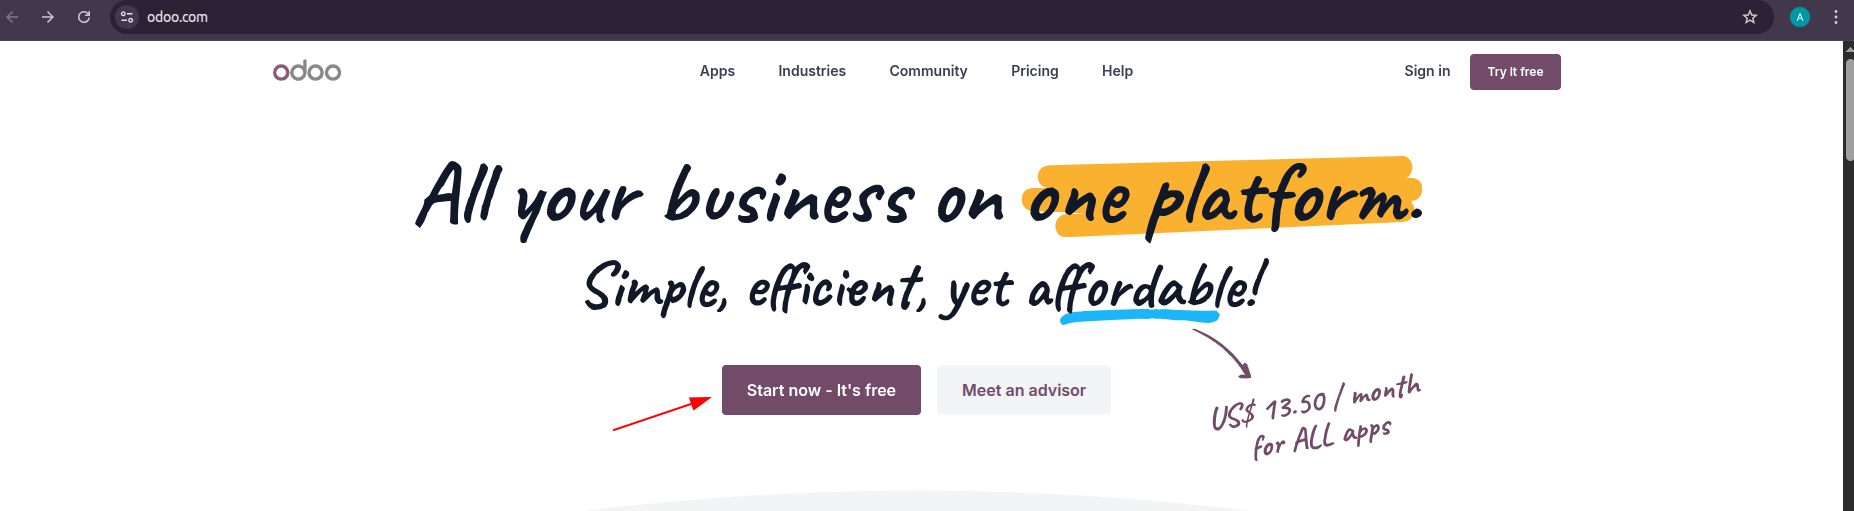
The first step is to visit the official Odoo website. Odoo offers a very generous "Free Trial" structure. You can either use one application forever for free, or test drive the entire suite of applications for 15 days.
- Open your web browser and navigate to www.odoo.com.
- On the homepage, you will prominently see a large green button that says "Start now - It's free". Click that button.
Step 2: Choose Your First Application
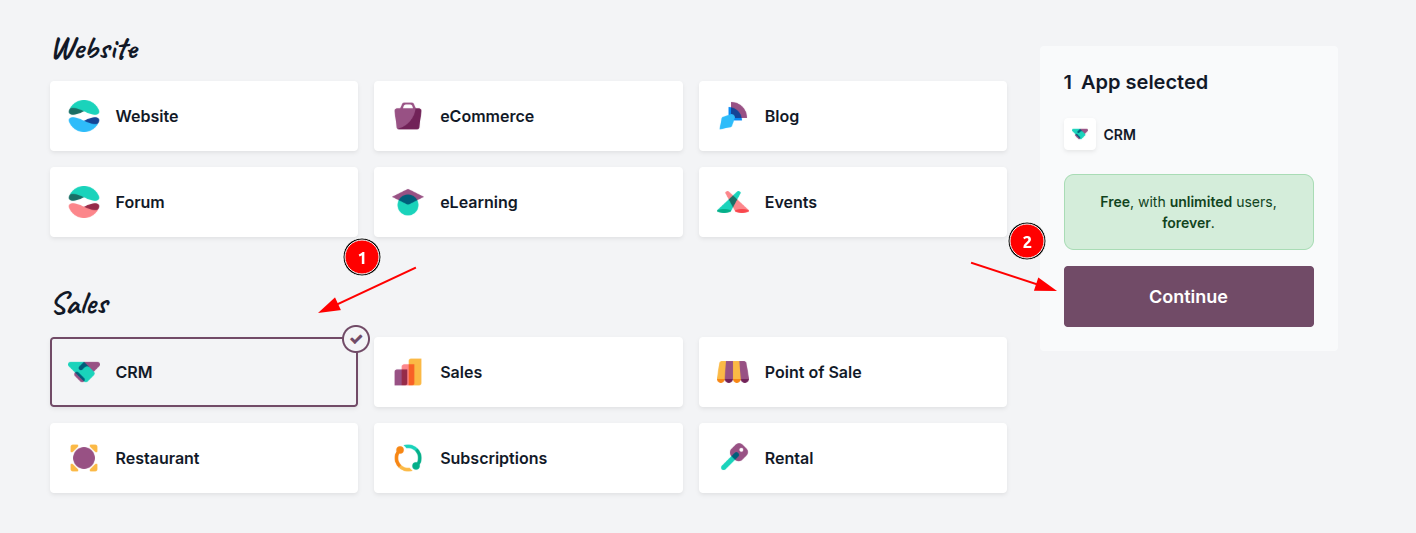
After clicking the registration button, you will be taken to the application selection page. This is where you see the core strength of Odoo’s modular design.
- Select the primary application your business needs right now. For instance, if you want to streamline your sales team, pick "CRM" or "Sales". If you are building an online store, choose "Website" or "eCommerce".
- Important Note: Odoo operates on a "One App Free" policy. If you select only one primary application (and its required dependencies), your database is free forever. If you select multiple distinct applications (like CRM and Accounting), you will enter the 15-day free trial period.
- For this tutorial, let's select "CRM". Click on its icon.
- Once selected, click the "Continue" button at the bottom of the page.
Step 3: Enter Your Personal Details & Configure the Database Name
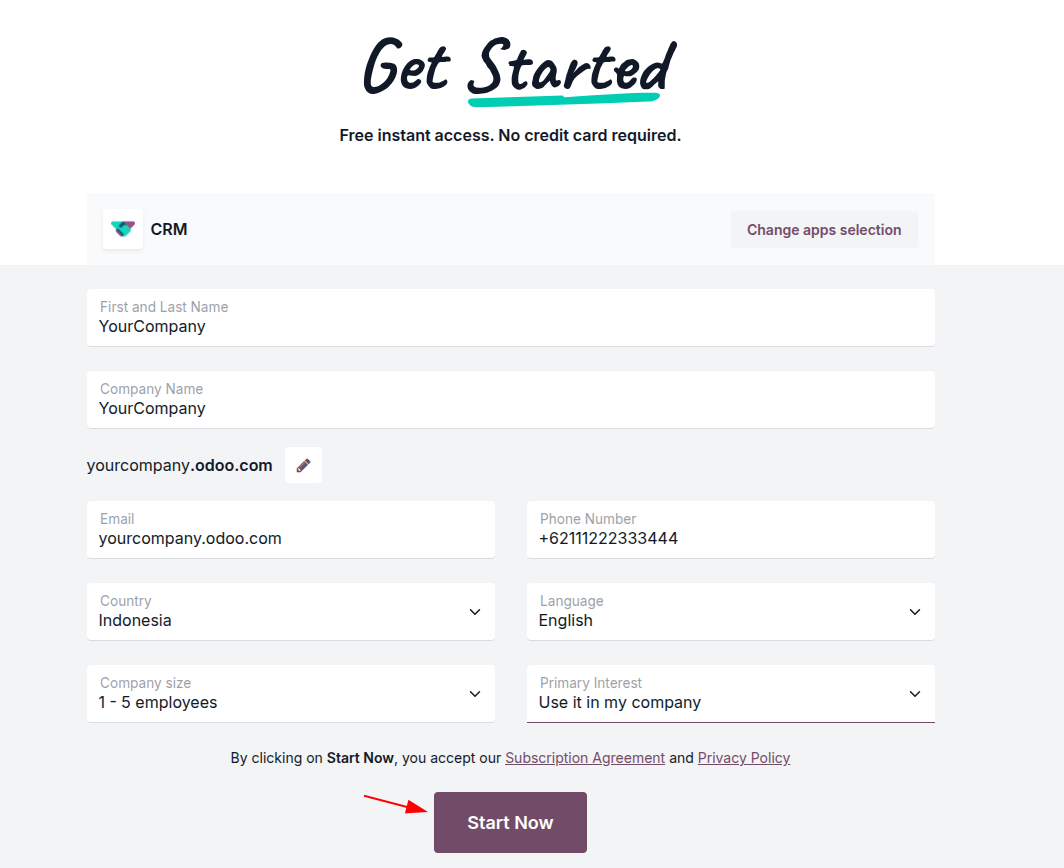
This is the most crucial setup step, where you define your Odoo identity in the cloud. You will be asked to fill out a brief form.
- Full Name: Enter your full name.
- Email: Enter an active email address. This will become the primary administrator account.
- Company Name: Enter your business name.
- Url (Database Name): Pay attention here! Odoo will automatically suggest a database name based on your company name (e.g., yourcompany.odoo.com). You can change this if the name is already taken. This URL will be your unique address to access Odoo from anywhere.
- Country & Language: Select your specific country and preferred language.
- Company Size: Choose the number of employees.
- Primary Interest: Select your main goal (e.g., "I want to use it for my company").
When everything is filled out, click "Start Now".
Step 4: The Database Activation Process
Congratulations! Odoo is now building your unique database on their secure servers. You will see a loading animation or a friendly message saying "Welcome to Odoo" while the system installs the modules you selected. This process usually takes less than one minute.
Once completed, you will be automatically redirected to your main Odoo Dashboard.


Step 5: Verify Your Email Address (CRITICAL!)
Although you are looking at your dashboard, your database is not fully secure yet. Odoo gives you a strict 4-hour window to verify your email address. If you fail to verify within this timeframe, your database will be automatically deleted.
- Check the inbox of the email address you used to register.
- Look for an email from Odoo with a subject like "Action Required: Activate your database".
- Open the email and click the large purple button that says "Click to activate your database".
- You will likely be asked to create a secure password for your administrator account.

Step 6: Configure Basic Company Data (Setup Essentials)
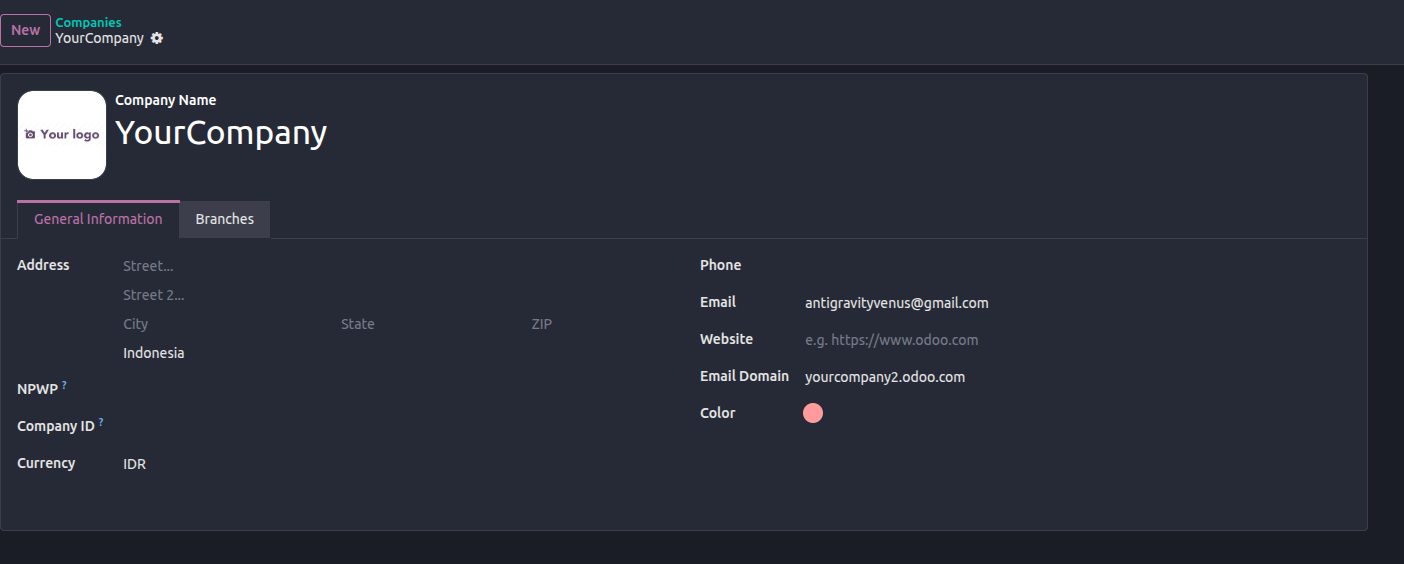
Once your email is verified, your database is safe. Now, it's time to perform some basic configuration so that any documents you generate (like sales quotations or invoices) look professional and contain the correct business information.
- From the Odoo Dashboard, click on the "Settings" icon (usually a gear).
- Go to the "Companies" menu -> Click on your company name.
- Fill in the full details: Address, Phone, Website, and upload your official Company Logo.
- Click the "Save" button (top-left).
Conclusion
The setup process for Odoo Online is designed to be instant, modern, and user-friendly. Within a matter of minutes, you have access to a world-class ERP system ready to help you manage and grow your business.
Your next steps are to invite your team, import your existing data (like products or customers), and begin exploring the advanced features available to you.